This article will consist of the following sections:
- A Retrofit Summary
- Install instructions
- An Isometric Drawing
- A Bill Of Materials
This article will include links to the Release Summary, Install instructions, an Isometric Breakdown and the Bill of materials. Please see the bottom if you would like to download these files.
Retrofit Summary
This new stainless-steel push-button station kits provide a new alternative to the plastic stations. The plastic stations had a high fail rate, due to cracking, poor seals, and breaking easily from daily use. Pictured below is a common example of this issue.
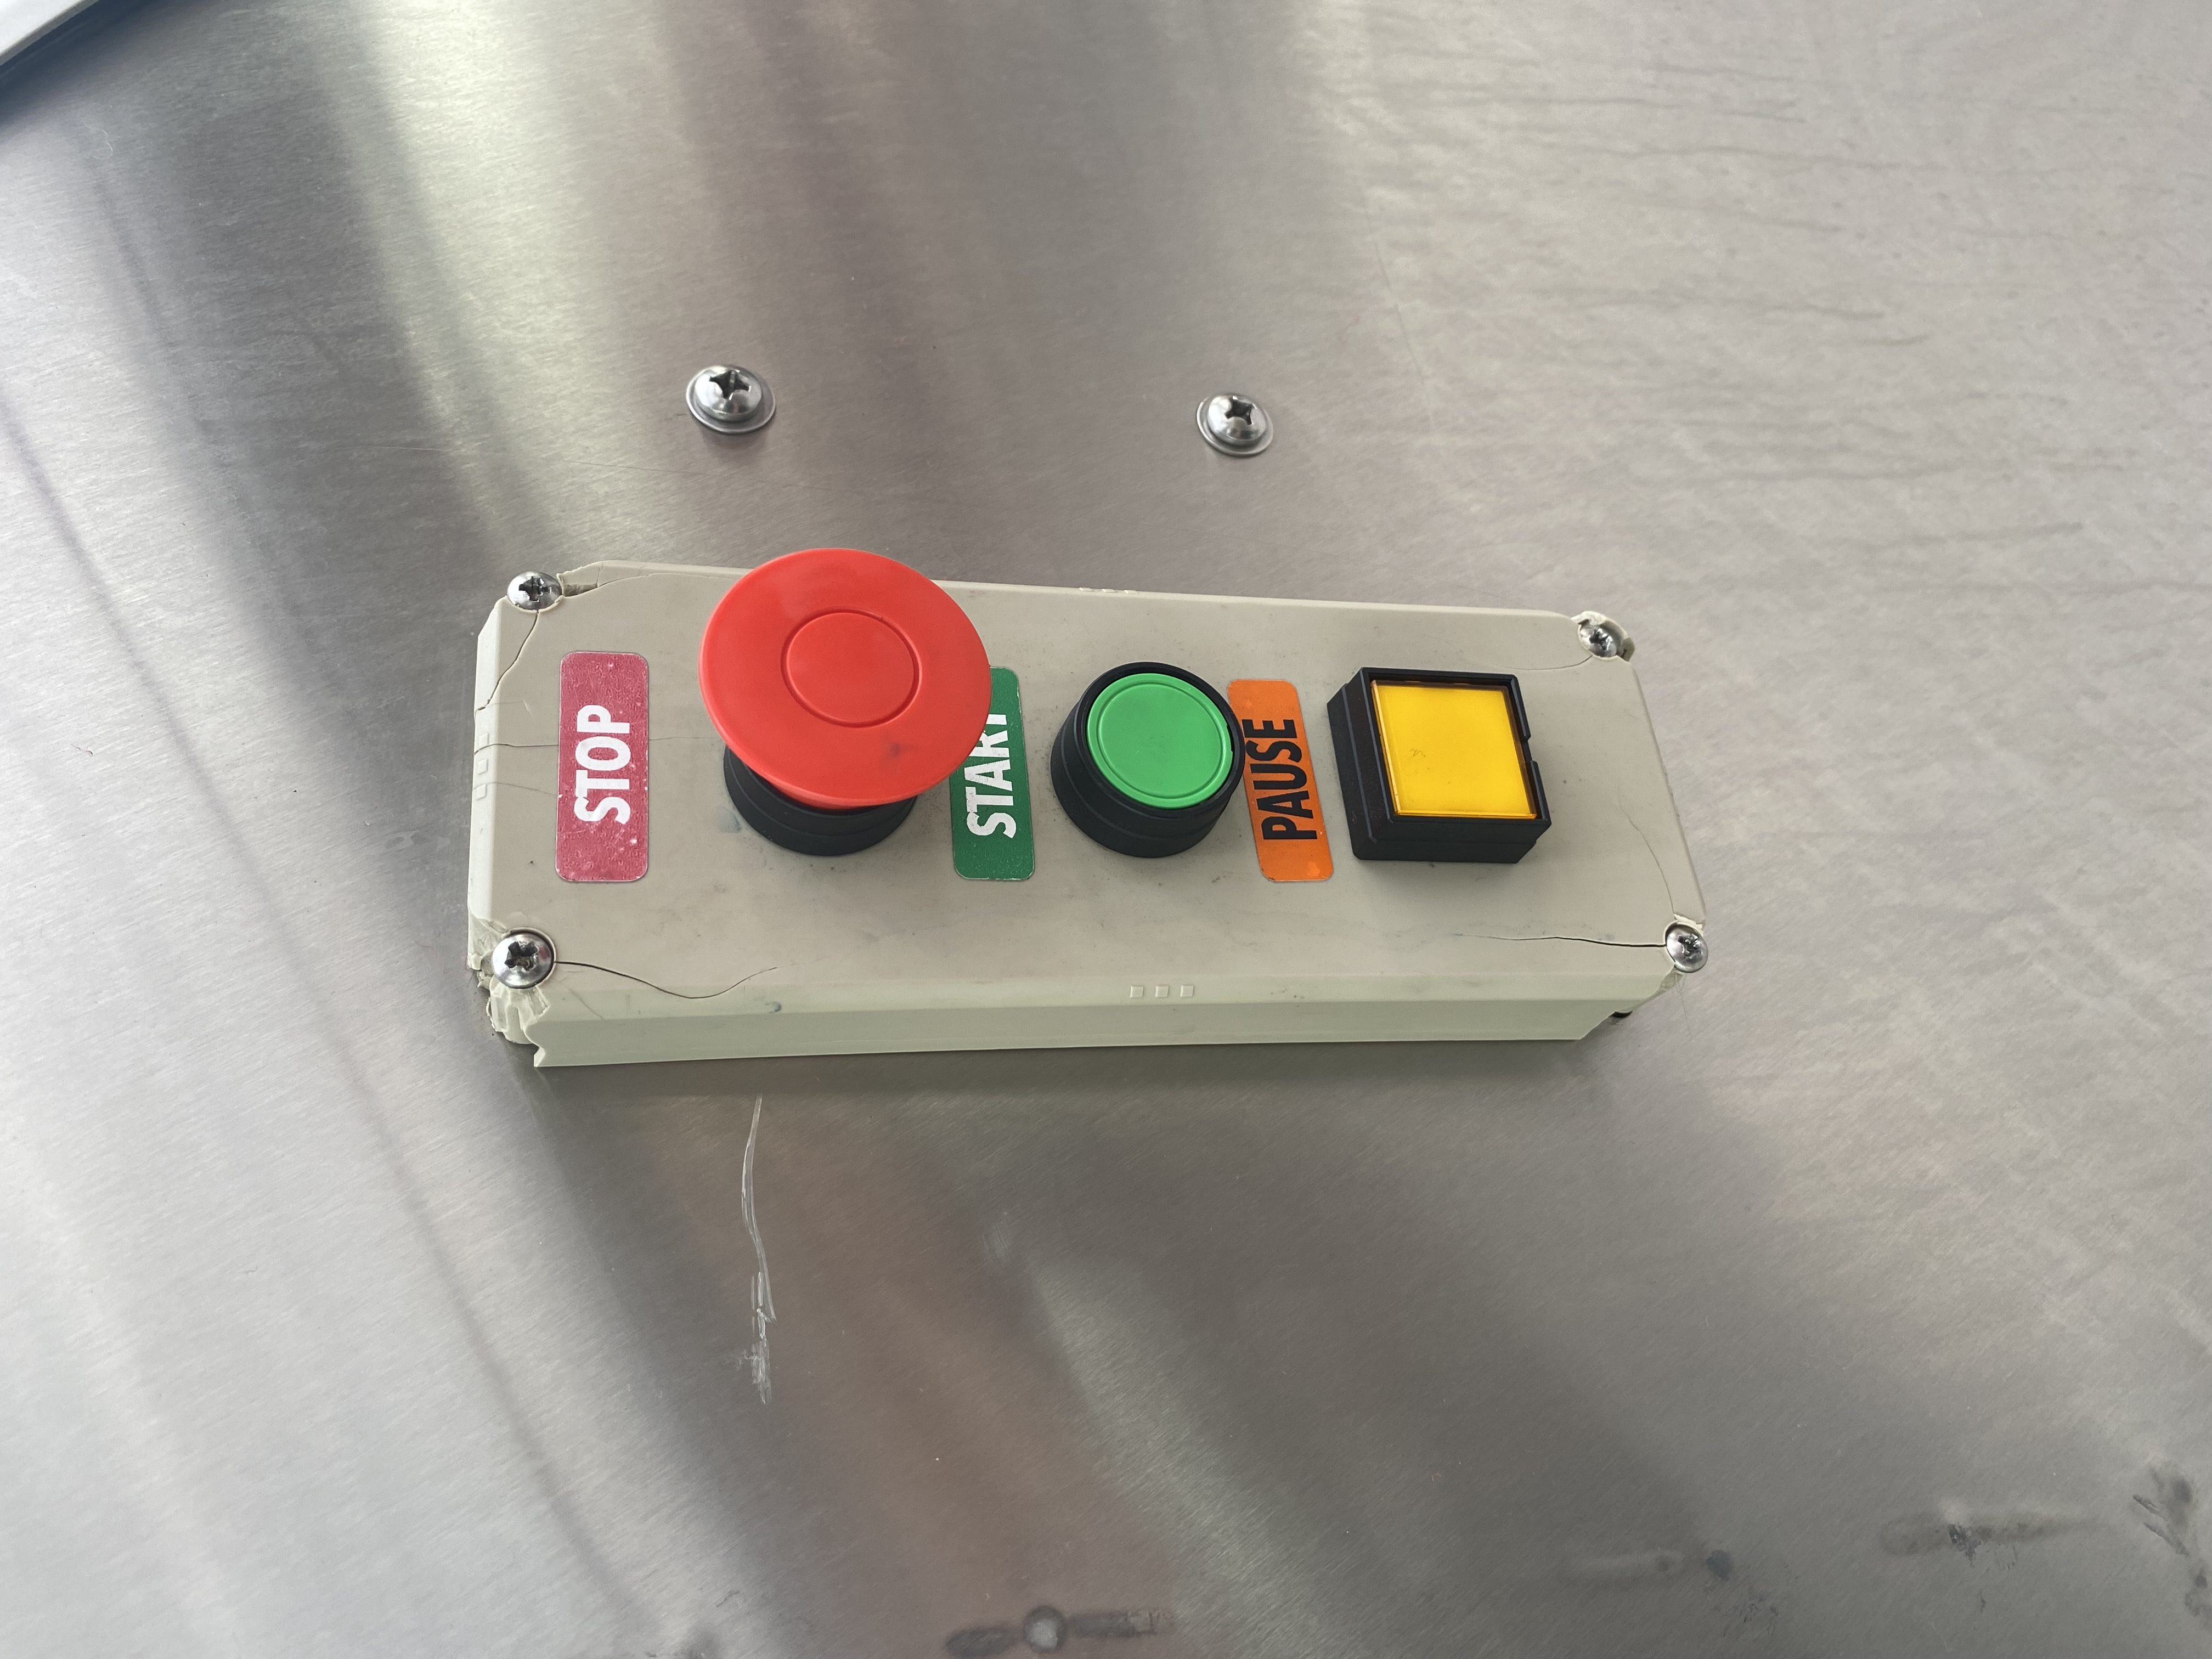
The new station will be more durable, have a sleek new design that sits flush with the pod, and will have a much better seal from water.
Installation Instructions
Notes: The wash will need to be shut down for this installation.
Tools Required:
- Adjustable Wrench
- Grinding Wheel
- Flat head screwdriver
- Philips head screwdriver
- Electrical tape
- Electric drill and a 5/16th inch bit
- 18 gage stranded wire
- Wire nuts
Steps:
- Shut down wash by pressing a red Wash Stop button and cut power.
- Unscrew Plastic push button station, exposing electrical wires.
- Label the wires as to what button they go to or take a picture. This will help with installing the new buttons later. Remove the wires from the buttons.
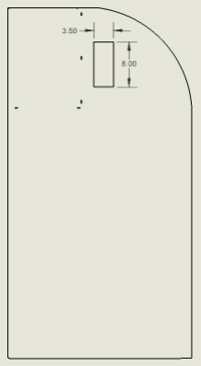
- Once the wires have been detached from the push button station, move them aside to avoid being cut. Mark out a 3-1/2"w x 8"h box on the POD face to cut.
- Note: Make sure that all the holes on the POD are in the middle of the box. These should all be removed.
- Use the grinding wheel to cut out the box. Note: the cut does not have to be perfect, as the adapter plate will cover any visual discrepancies.
- Verify that the new push button station front plate will fit through the new hole on the POD panel.
- Note: This needs to fit through, so there is a good seal for the buttons and the plate.
- Use adapter plate provided as a template to mark and drill the outside holes on the POD face.
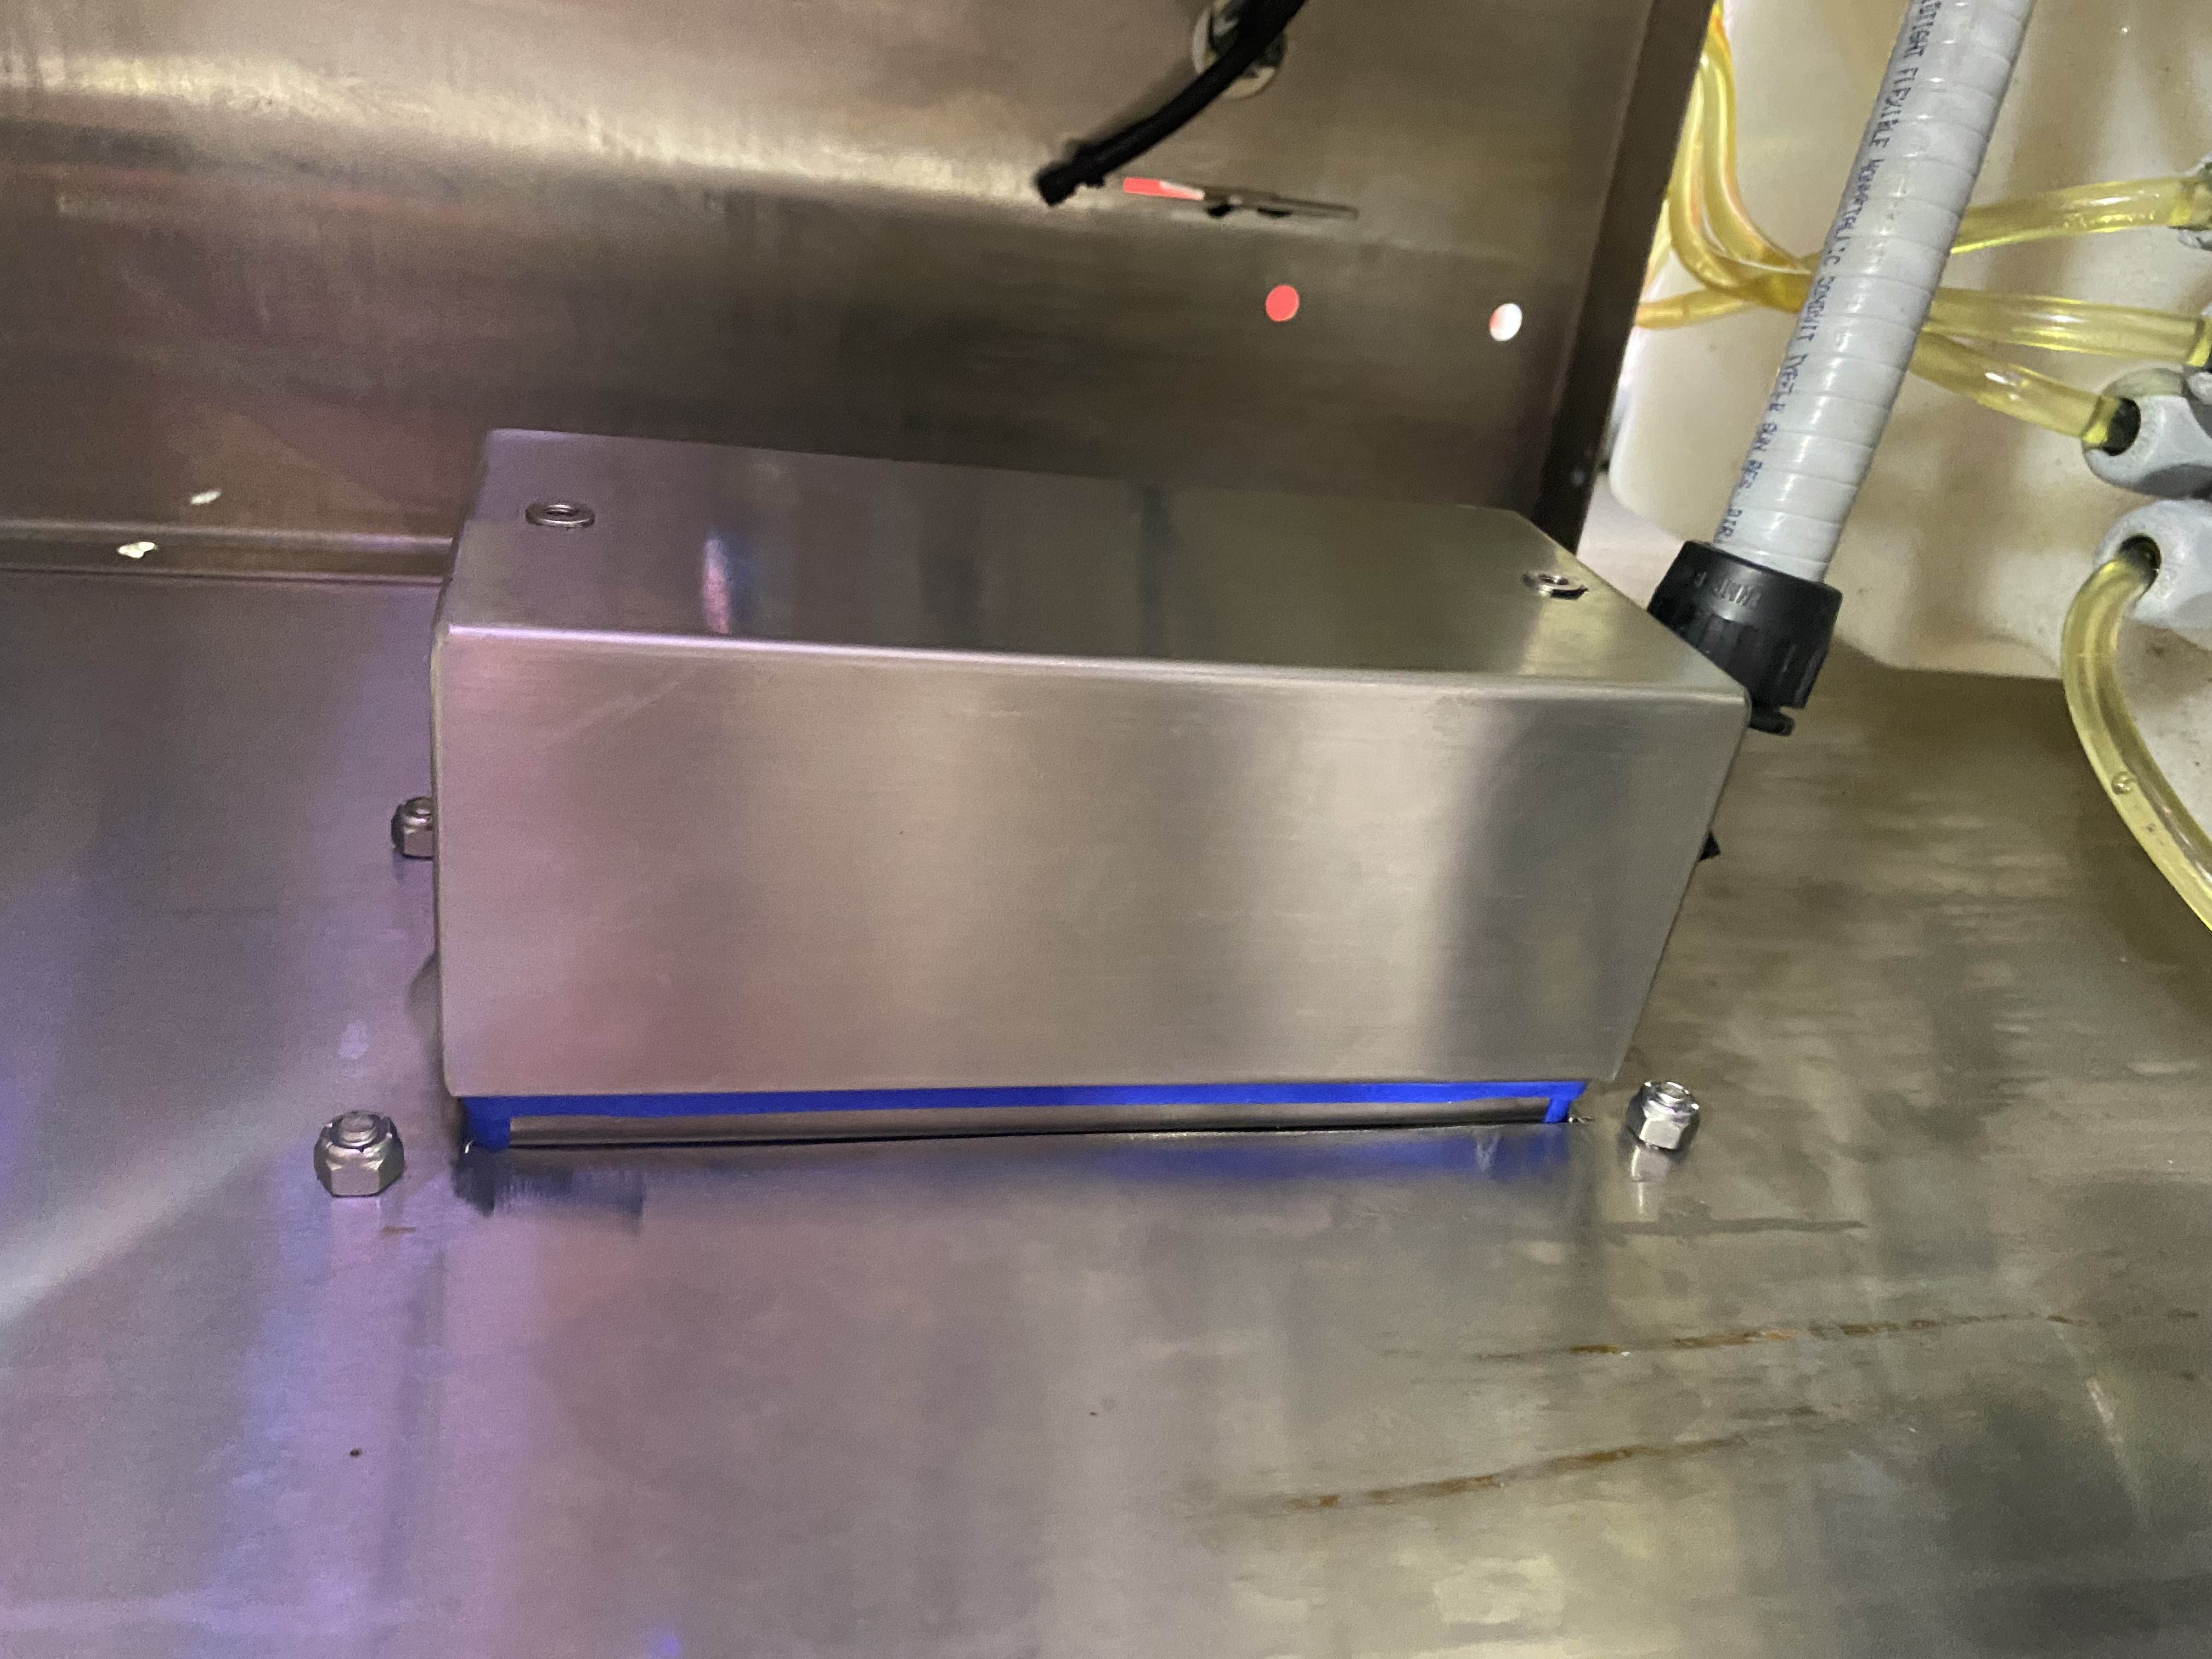
- Attach the swivel lock conduit to the 7/8" hole on the box - this will be at the bottom of the box.
- Attach the adapter plate to the POD using the fasteners provided.
- Align the 3 holes of the adapter plate to the 3 holes on the push button station and attach the push buttons. Tighten by hand.
- Caution: Overtightening the buttons can cause the buttons to break.
- Note: The adapter plate should be flush with the push button station front plate.
- Insert the Swivel Lok fitting in the newly cut hole. The NPT fitting should be sent through the hole, and the rubber gasket should remain on the outside of the box. Tighten the fitting.
- Run the wires thru the Swivel Lok and attach the wires that were labeled to their corresponding button. Extra 18 gauge wire and wire nuts may be necessary
- Note: All buttons use a common ground.
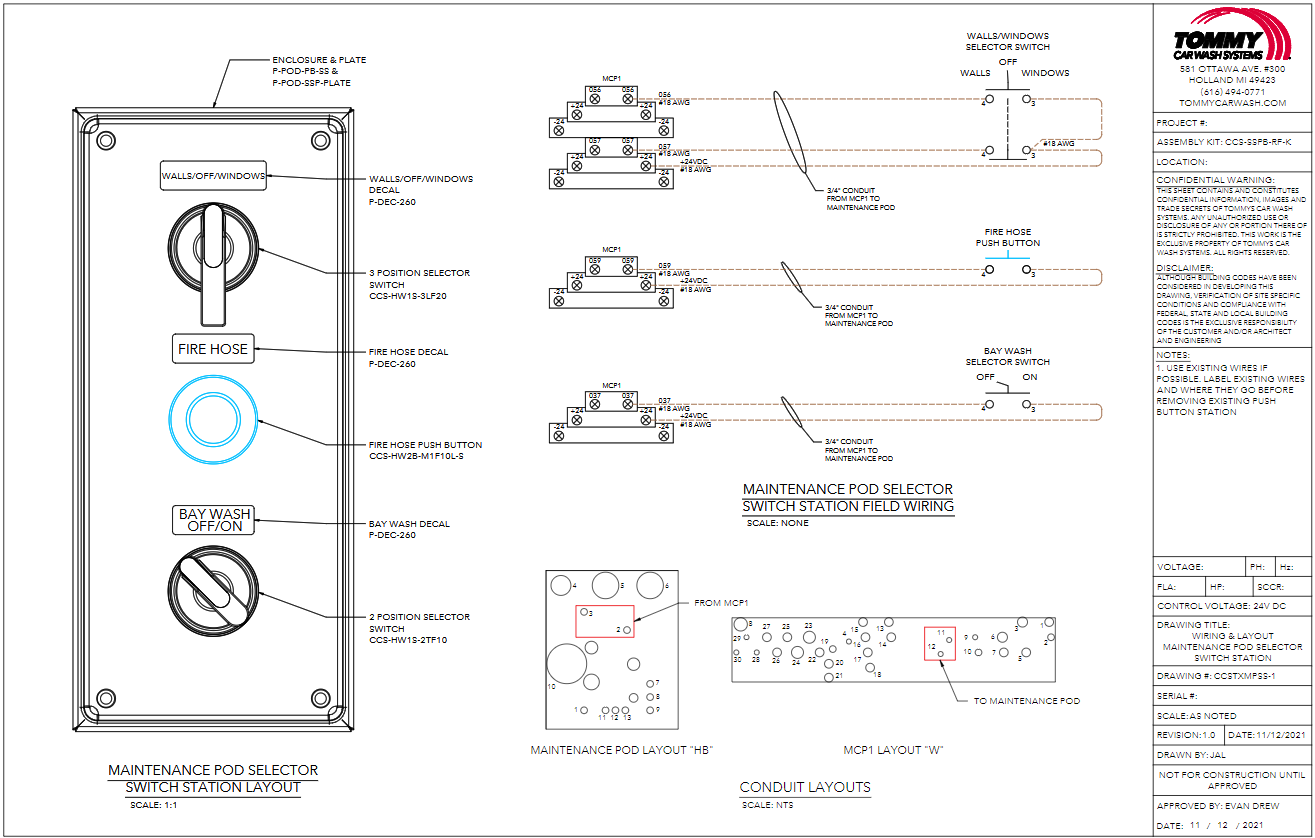
- Note: If wires were not labeled, use the wiring diagram provided.

- Pull out the wash stop button that was pushed to stop the wash, turn on power, and test if the new buttons are working. End with pushing wash stop button.
- Tighten the electrical box to the POD face, and verify all seals are properly working. Add Start/Stop/Pause Decals.
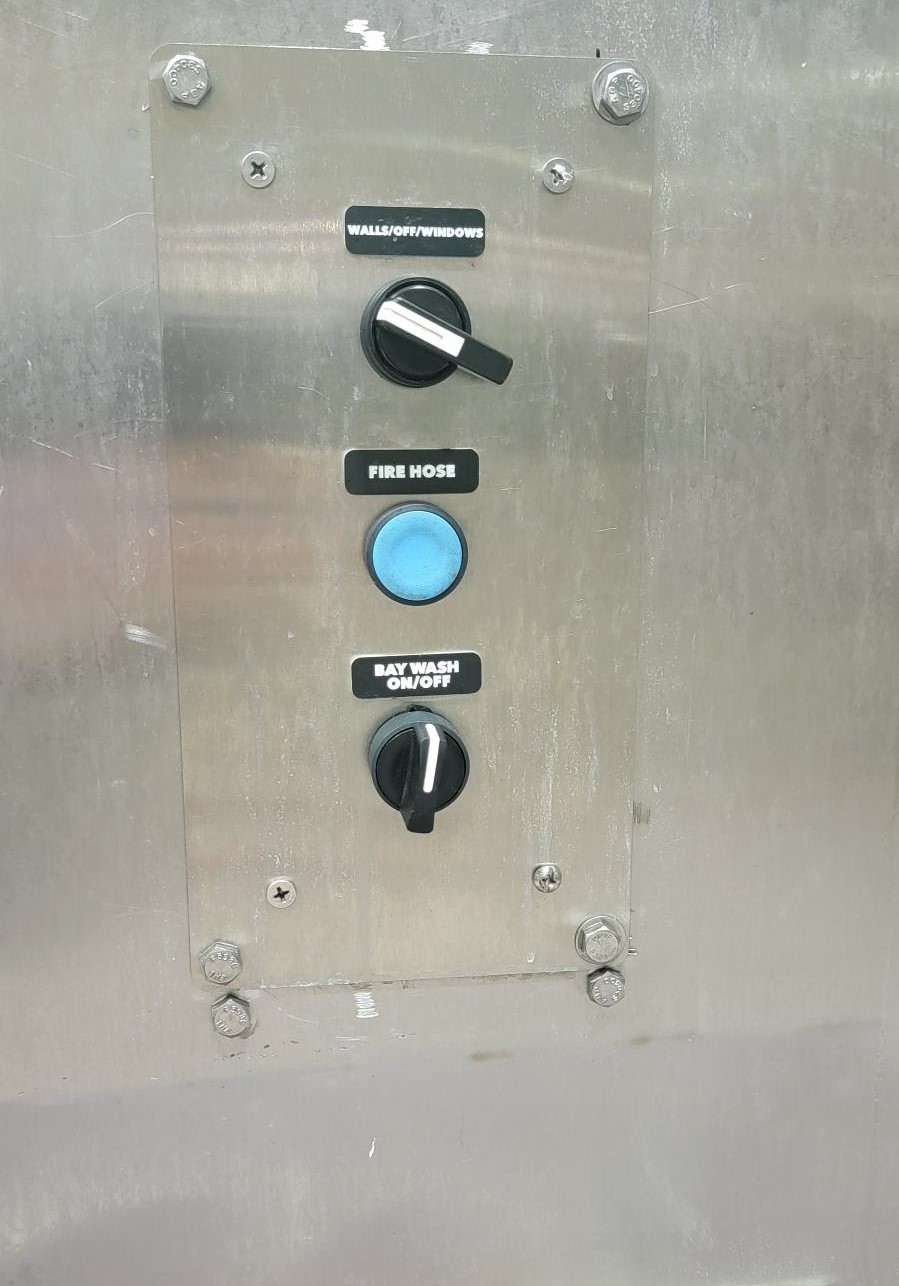
- Note: For the maintenance POD, decals should be in this order from the top: Walls/Off/Windows, Fire Hose, Bay Wash On/Off.
Please see the bottom of this article for downloadable instructions and a job verification checklist.
ISO Breakdown
Bill Of Materials
| Push Button Station | ||
| PART | DESCRIPTION | QTY |
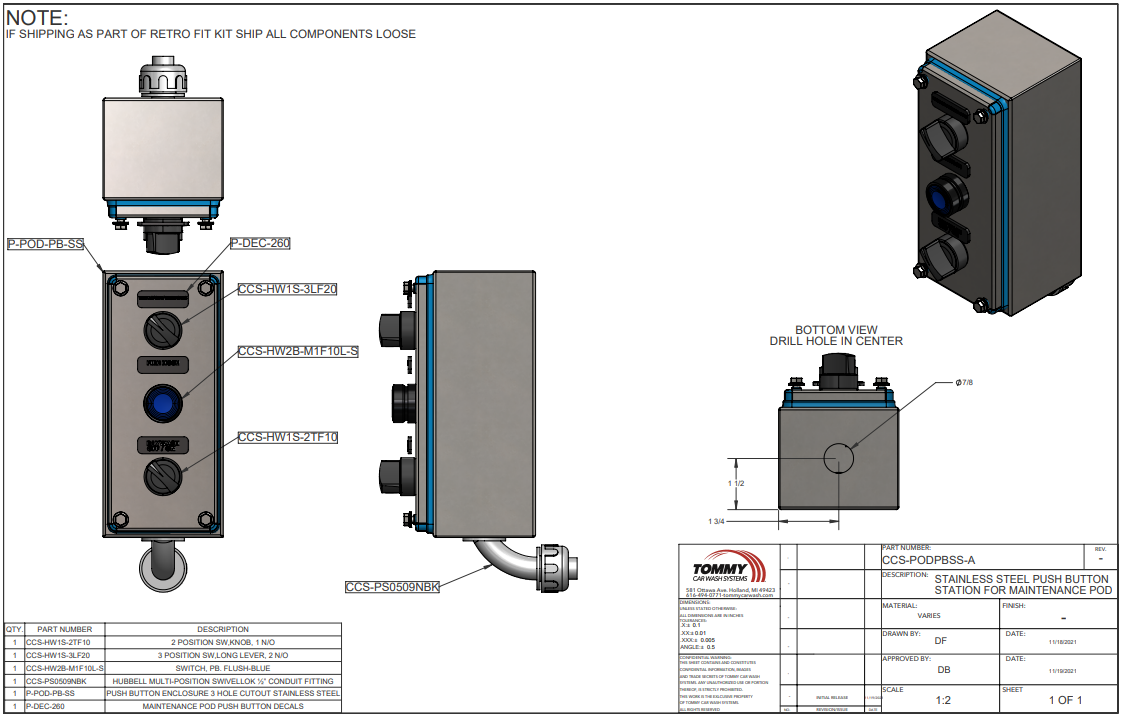
| CCS-SSPB-RF-K | Stainless Steel Push Button Station Retrofit kit for the Pod | |
| CCS-PODPBSS-A | Stainless Steel Push Button Station for Maintenance POD | 1 |
| P-POD-SSP-PLATE | Push button Station Retrofit Plate | 1 |
| P-SS-1033 | #10-24 x 1/2" Phillips Drive Pan Head Grade 18-8, SS | 4 |
| P-RX-2017 | #10-24 Stainless Steel Nylock Nut | 4 |
| P-DEC-260 | Windows, fire hose, bay wash Maintenance POD decals for push button station retrofit kit only. | 1 |
| CCS-PODPBSS-A | Stainless Steel Push Button Station for Maintenance POD | |
| CCS-HW1S-3LF20 | 3 Position SW,Long Lever, 2 N/O | 1 |
| CCS-HW1S-2TF10 | 2 Position SW,Knob, 1 N/O | 1 |
| P-POD-PB-SS | Push Button Enclosure 3 Hole Cutout Stainless Steel | 1 |
| CCS-HW2B-M1F10L-S | Switch, Illm, PB,square,Flush-Blue,1 NO,no Led | 1 |
| CCS-PS0509NBK | Hubbell Multi-Position SwivelLok ½” Conduit Fitting | 1 |
| Maintenance POD BOM Change | ||||
| PART | DESCRIPTION | ADD QTY | REMOVE QTY | TOTAL QTY |
| E-POD-MAINT-A | Tommy's Express Versadial Maintenance Smart POD | |||
| E-SE-C2058-A | Start Stop Pause Station | 1 | 0 | |
| CCS-70174985-A | Start-Stop-Pause SS Push Button Station Assembly | 1 | 1 | |
| CCS-FB3W-311Z | Enclosure, 3 Hole, Beige | 1 | 0 | |
| CCS-HW1S-2TF10 | 2 Position SW,Knob, 1 N/O | 1 | 0 | |
| CCS-HW1S-3LF20 | 3 Position SW,Long Lever, 2 N/O | 1 | 0 | |
| CCS-HW2B-M1F10L-S | Switch, Illm, PB,square,Flush-Blue,1 NO,no Led | 1 | 0 | |
| CCS-PS0509NBK | Hubbell Multi-Position SwivelLok ½” Conduit Fitting | 1 | 0 | |
| CCS-PODPBSS-A | Stainless Steel Push Button Station for Maintenance POD | 1 | 1 | |
| TX-E-POD-MAINT-A | Tommy's Express Versadial Maintenance Smart POD | |||
| E-SE-C2058-A | Start Stop Pause Station | 1 | 0 | |
| CCS-70174985-A | Start-Stop-Pause SS Push Button Station Assembly | 1 | 1 | |
| CCS-FB3W-311Z | Enclosure, 3 Hole, Beige | 1 | 0 | |
| CCS-HW1S-2TF10 | 2 Position SW,Knob, 1 N/O | 1 | 0 | |
| CCS-HW1S-3LF20 | 3 Position SW,Long Lever, 2 N/O | 1 | 0 | |
| CCS-HW2B-M1F10L-S | Switch, Illm, PB,square,Flush-Blue,1 NO,no Led | 1 | 0 | |
| CCS-PS0509NBK | Hubbell Multi-Position SwivelLok ½” Conduit Fitting | 1 | 0 | |
| CCS-PODPBSS-A | Stainless Steel Push Button Station for Maintenance POD | 1 | 1 | |