This article will consist of the following sections:
- A Retrofit Summary
- Install instructions
- An Isometric Drawing
- A Bill Of Materials
This article will include links to the Release Summary, Install instructions, an Isometric Breakdown and the Bill of materials. Please see the bottom if you would like to download these files.
Retrofit Summary
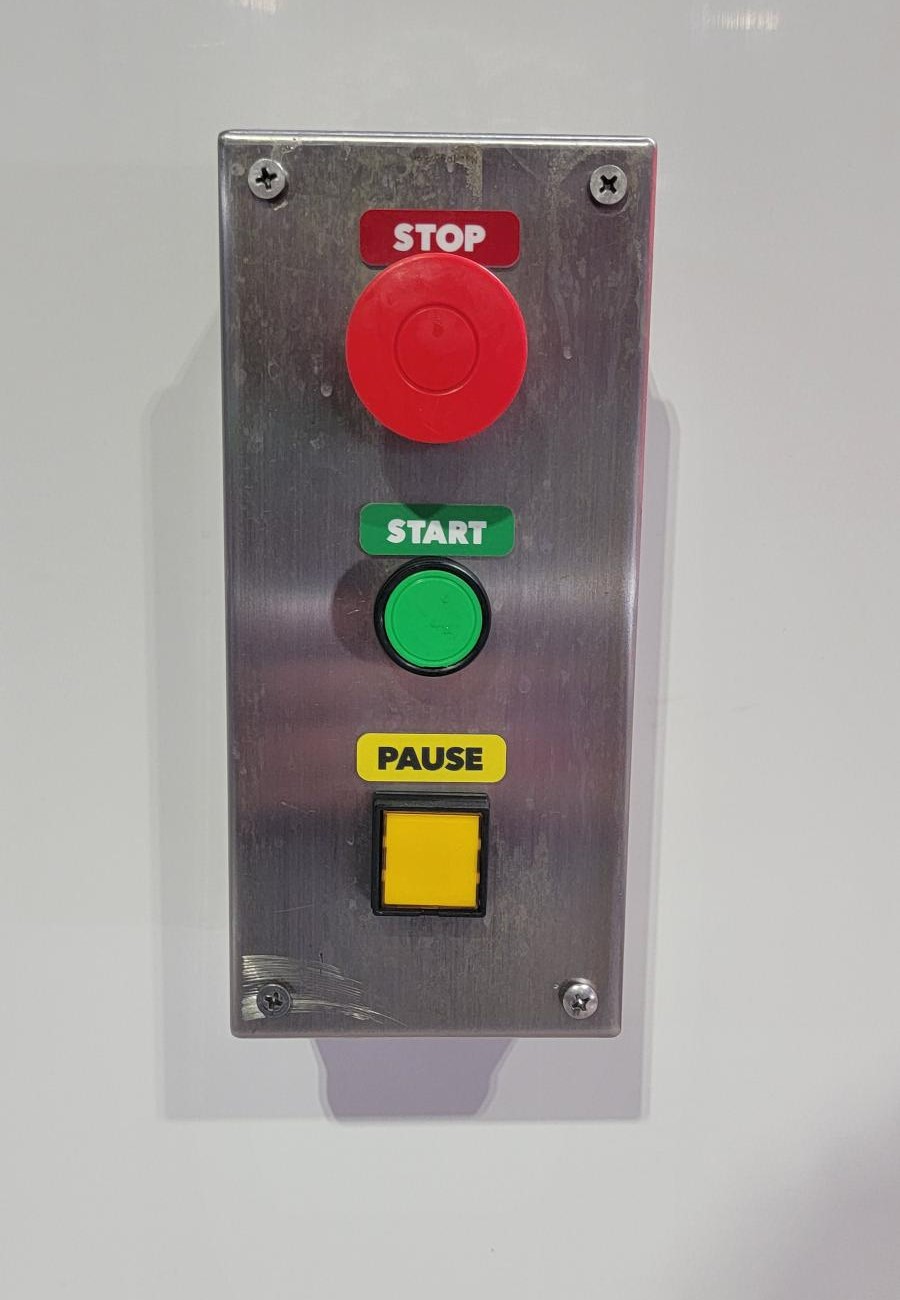
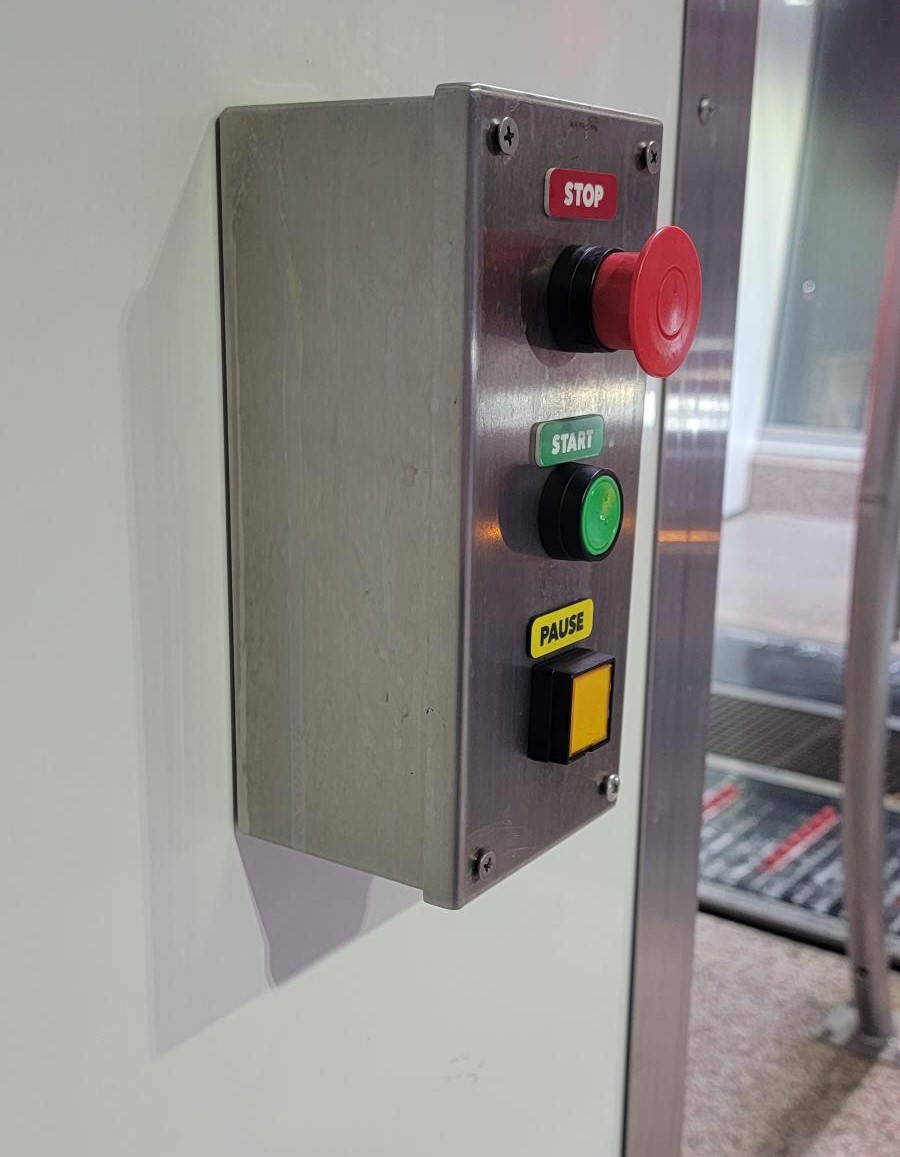
This new stainless-steel push-button station kits provide a new alternative to the plastic stations. The plastic stations had a high fail rate, due to cracking, poor seals, and breaking easily from daily use. Pictured below is a common example of this issue.
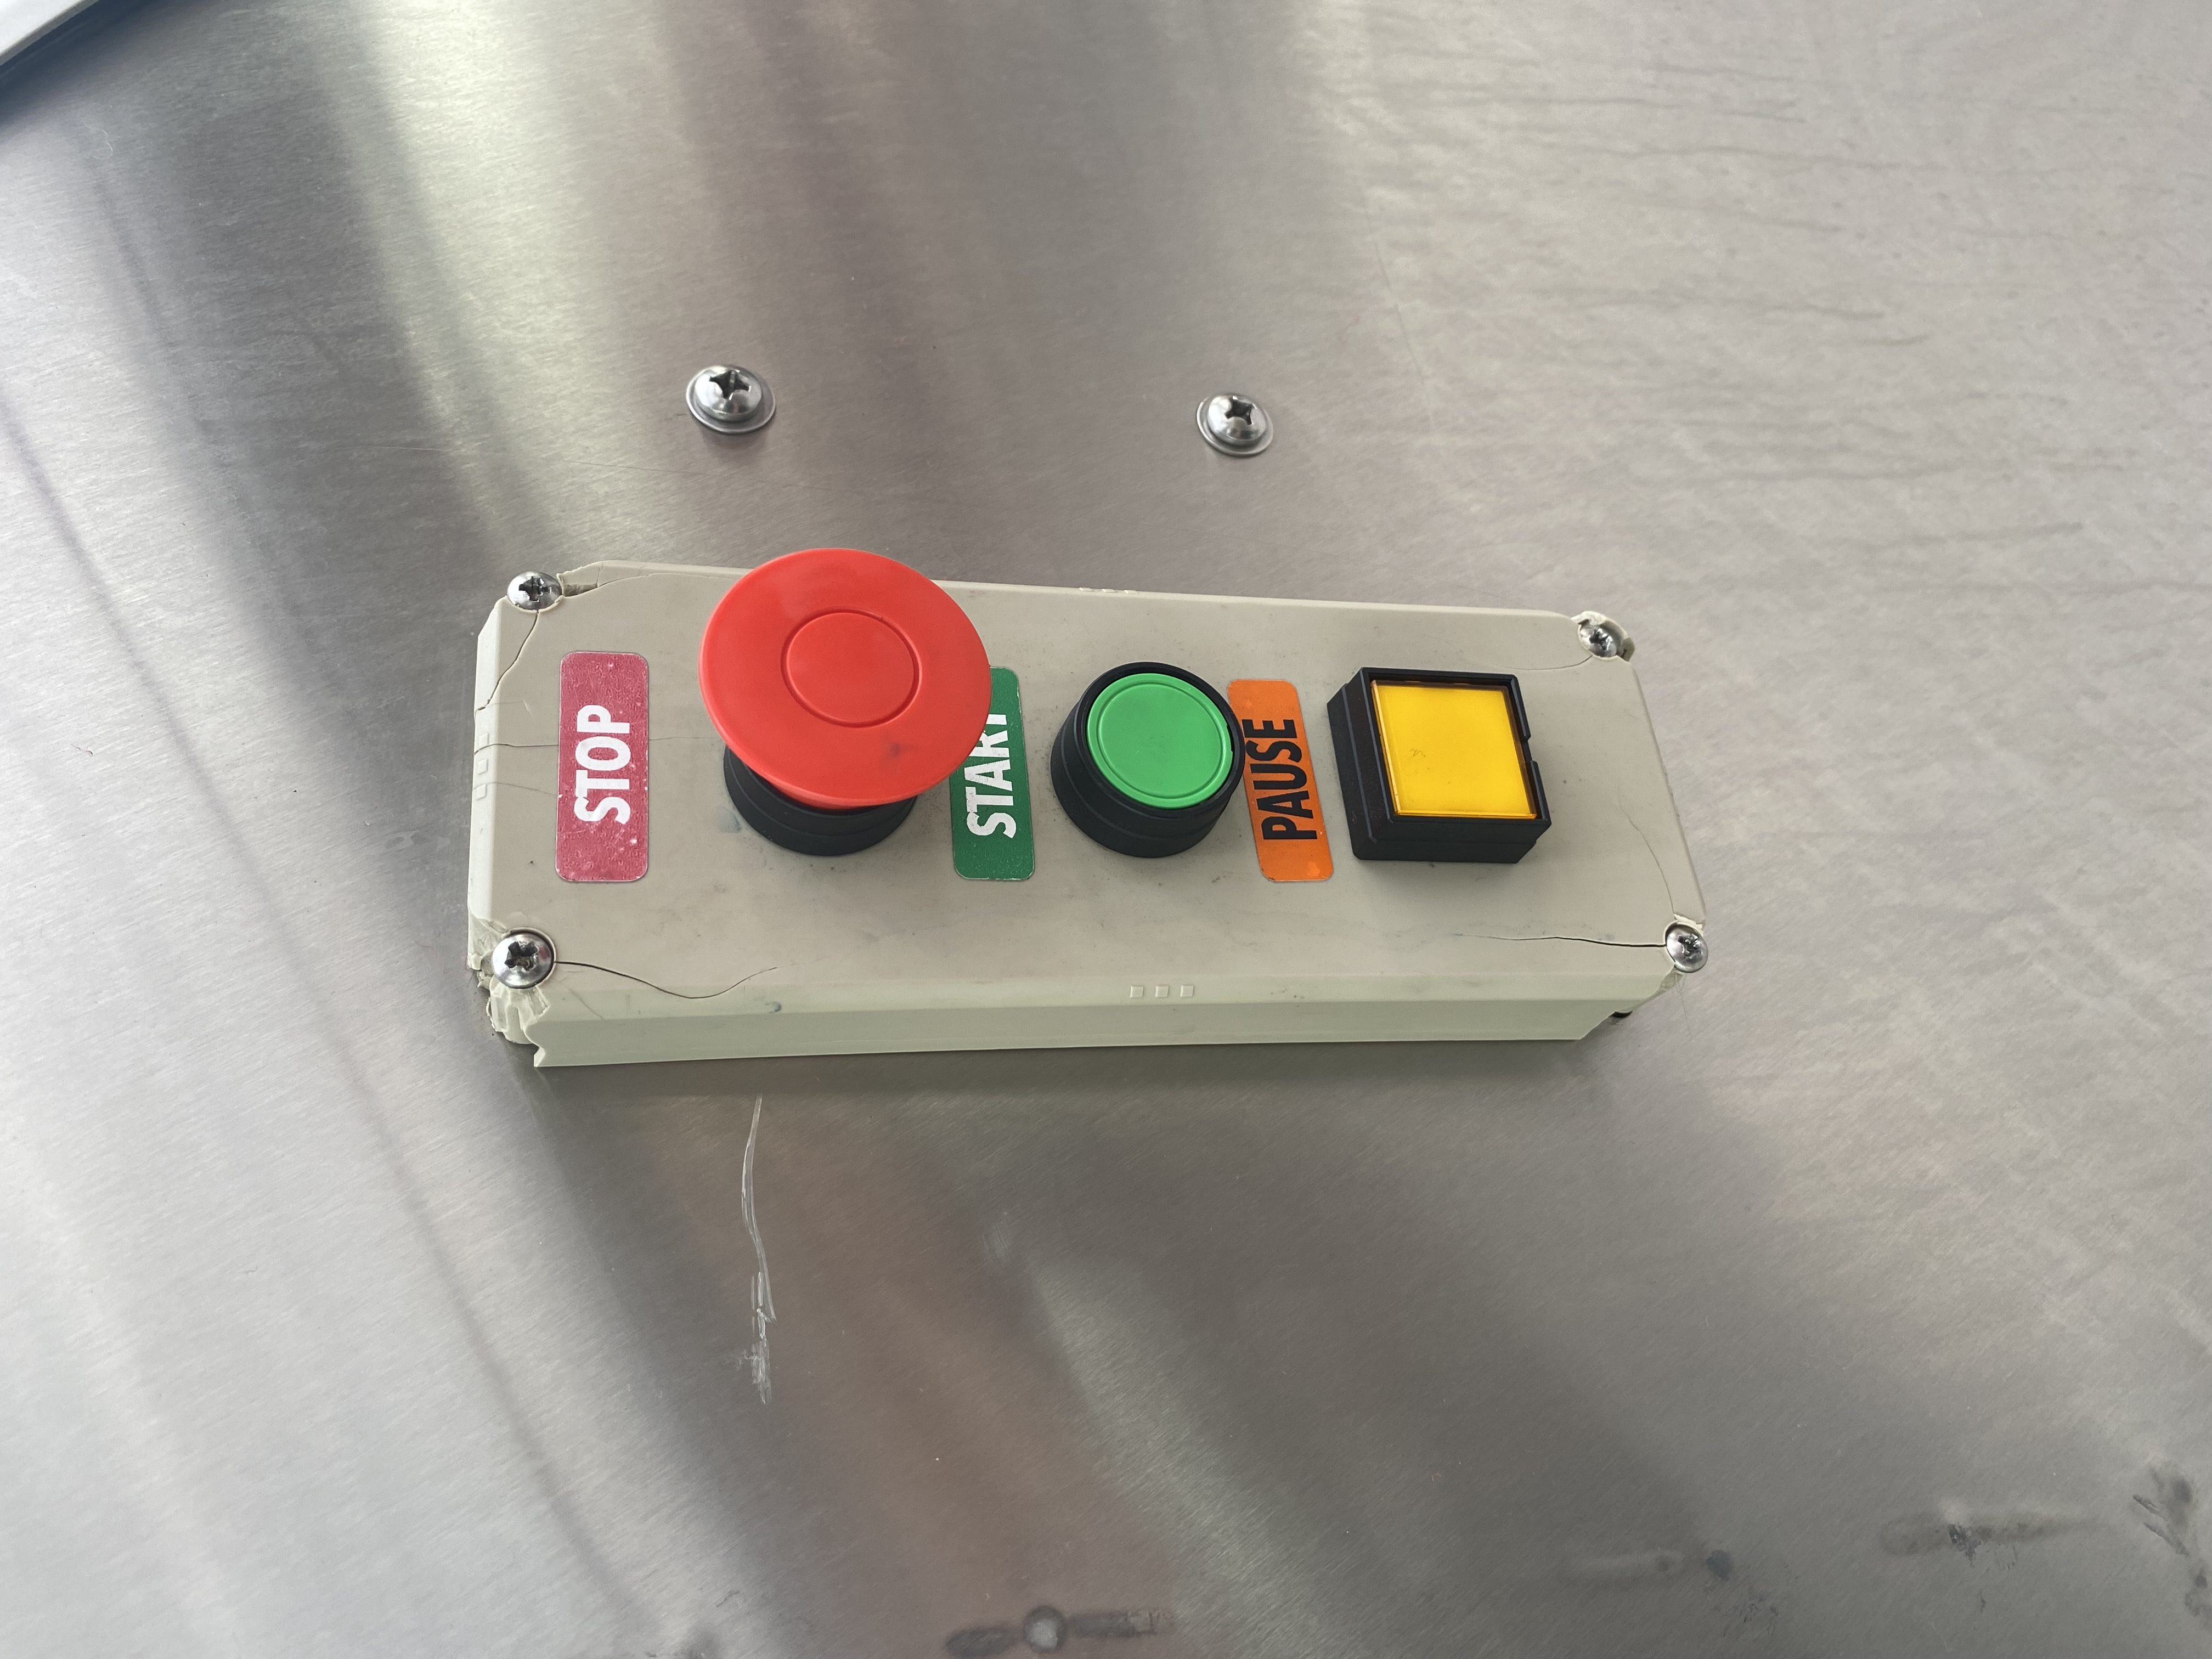
The new station will be more durable, have a sleek new design that sits flush with the pod, and will have a much better seal from water.
Installation Instructions
Notes: The wash will need to be shut down for this installation.
Tools Required:
- Adjustable Wrench
- Flat head screwdriver
- Philips head screwdriver
- Electrical tape
- Electric drill and a 5/16th inch bit
- 18 gage stranded wire
- Wire nuts
Steps:
- Shut down wash by pressing a red Wash Stop button and cut power.
- Unscrew Plastic push button station, exposing electrical wires.
- Take a Picture or label the wires as to what button they go to. This will help with installing the new buttons later. Remove the wires from the buttons.
- Remove the old push button station off of the wall and remove any mounting hardware. This can be reused for the new stainless steel box.
- Attach the SwivelLok to the new box and attach the existing conduit by running the wires through it. Note: this box should have the 7/8" hole located on the back of the box. The Swivel Lok should be facing downward through the existing hole in the wall. Or Reuse the existing Swivel Lok.
- Hold the Box against the wall and predrill two 1/4" holes to screw the box to the wall. Screw the box to the wall.
- Attach the buttons to the front face of the push button station. Rewire the buttons. NOTE: Use the wiring guide provided if the wires were not labeled.
- NOTE: Verify that the wires are going through the push button box before wiring.
- Pull out the wash stop button that was pushed to stop the wash, turn on power, and test if the new buttons are working. End with pushing wash stop button.
- Tighten the front plate to the push buttons station box, and verify all seals are properly working. Add Start/Stop/Pause Decals.
ISO Breakdown
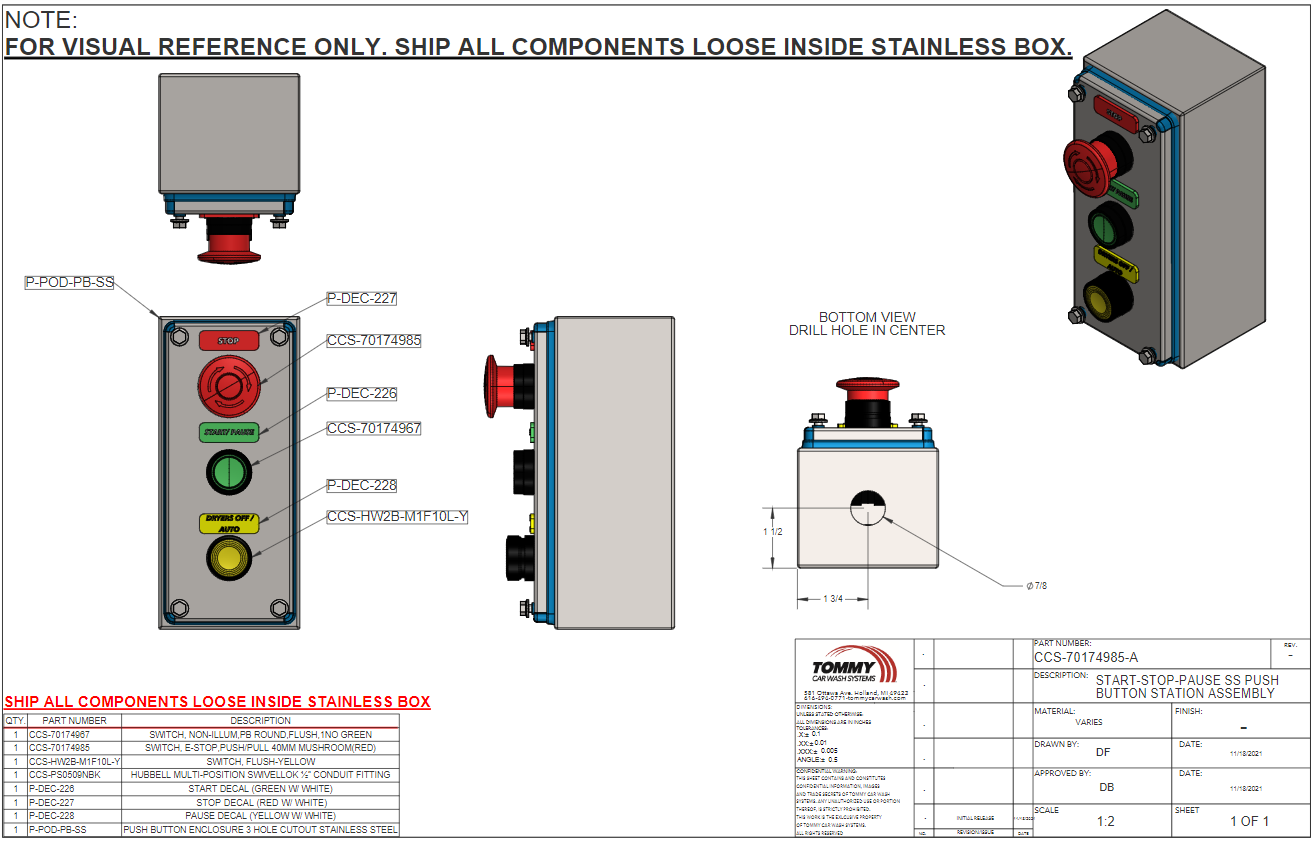
Bill Of Materials
| Push Button Station | ||
| PART | DESCRIPTION | QTY |
| CCS-SSPS-WM-A | Stainless Steel Push Button Station Retrofit kit for Wall Mount | |
| CCS-70174985 | Switch, E-Stop, Push/Pull 40MM Mushroom(RED) with 1NC | 1 |
| CCS-70174967 | Switch, NON-Illum, PB round,Flush,1NO Green | 1 |
| P-POD-PB-SS | Push Button Enclosure 3 Hole Cutout Stainless Steel | 1 |
| CCS-HW2B-M1F1OL-Y | Switch,Illm,PB,round,Flush-yellow,1 NO | 1 |
| CCS-PS0509NBK | Hubbell Multi-Position SwivelLok ½” Conduit Fitting | 1 |
| P-DEC-226 | Start Decal (Green w/ White) | 1 |
| P-DEC-227 | Stop Decal (Red w/ White) | 1 |
| P-DEC-228 | Pause Decal (Yellow w/ White) | 1 |