Vacuum Canopy Installation Guide
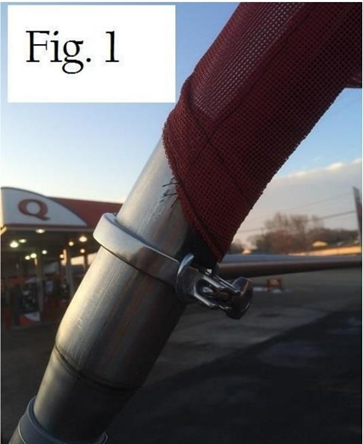
- Place one collar clamp (Fig 1, above) on each side of the arch cylinders 1-2 inches above the spreader bar on the wide side of the vacuum assembly. At this point the clamps should be positioned so the opening faces AWAY from the spreader bar and vacuum interior (I.E., 90 degrees counterclockwise from example shown Fig 1).
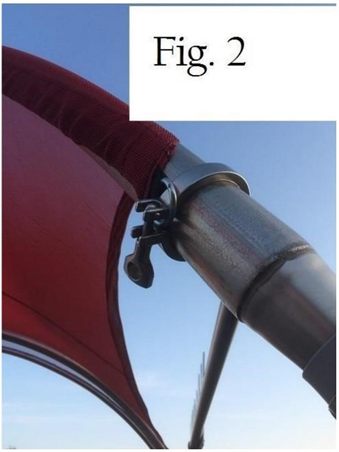
- Place the wide-end canopy ring through the forward-most clamp opening projection (Fig. 2), around the threaded part of the clamp. Then thread the wing nut through, closing the clamp and securing the canopy ring to the clamp as shown (Fig. 2) (both sides). Do not over-tighten.
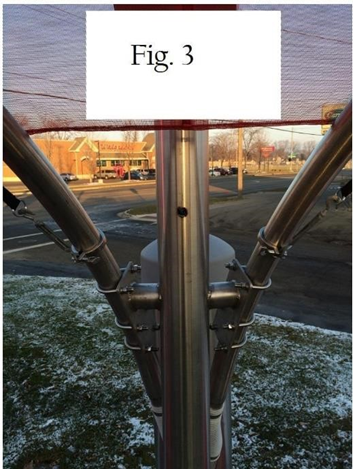
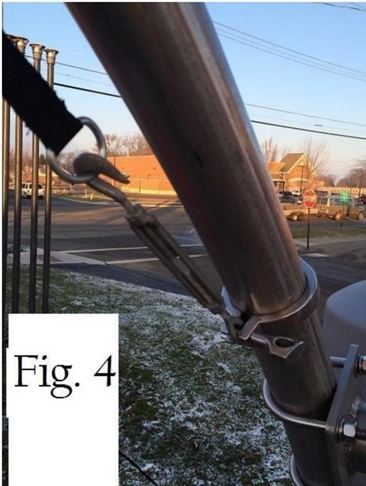
- On the narrow end of the vacuum assembly, place remaining collar clamps about 8 inches above the metal plates securing the outer arches to the center tube, as shown (Fig. 3). Put the turnbuckle eye through the threaded bolt openings on the clamp and place the wing nut through the bolts and eye, securing the turnbuckle to the clamp (Fig. 4). Tighten clamps securely.
- Hook the turnbuckle hooks to the narrow-side canopy rings (Fig. 4). Make sure turnbuckles are fully extended.
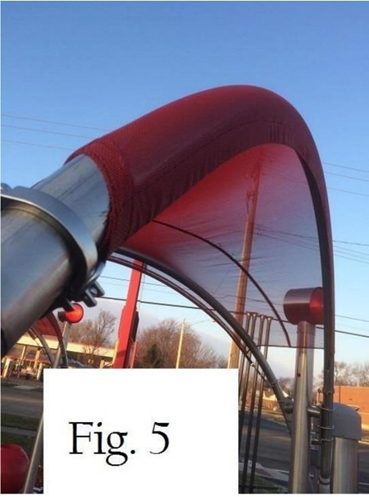
- Work the canopy up and over the arches on both sides (Fig 5).
- Rotate wide-side camps inwards and tighten securely, as shown (Fig 1.) Snug them with hammer if necessary.
Use turnbuckles to tighten the narrow side until all wrinkles are out of the canopy.
Tip: Once the arches are wrapped tension will hold the canopy in place like a covered wagon, as shown. The metal rings, fabric, and clamps are all built for incredible tension. You cannot break them, so be prepared to use force and “Work” the canopy around the arches until the wrinkles are out and the canopy lays smoothly.
- The canopies will stretch after about 3 weeks. Retighten the turnbuckles at that point.